To run our microservice, we need to add just one last bit of code. In the bin folder, create a main.py file with the following code:
/bin/main.js
const BeaconsProcess = require('../obj/src/containers/BeaconsProcess').BeaconsProcess;

try {
    let proc = new BeaconsProcess();
    proc._configPath = "./config/config.yml";
    proc.run(process.argv);
} catch (ex) {
    console.error(ex);
}
/src/service/process/Program.cs
namespace Process
{
    class Program
    {
        static void Main(string[] args)
        {
            try
            {
                var process = new BeaconsProcess();
                process.RunAsync(args).Wait();
            }
            catch (Exception ex)
            {
                Console.WriteLine(ex);
                Console.ReadLine();
            }
        }
    }
}
/bin/main.go
package main

import (
	"os"
	"context"
	cont "github.com/pip-services-samples/service-beacons-gox/containers"
)

func main() {
	proc := cont.NewBeaconsProcess()
	proc.SetConfigPath("./config/config.yml")
	proc.Run(context.Background(), os.Args)
}
/bin/run.dart
import 'package:pip_services_beacons_dart/pip_services_beacons_dart.dart';

void main(List<String> argument) {
  try {
    var proc = BeaconsProcess();
    proc.configPath = './config/config.yml';
    proc.run(argument);
  } catch (ex) {
    print(ex);
  }
}
/bin/main.py
import sys
import traceback
import os

from pip_services3_components.log import ConsoleLogger

# add parent directory to path
sys.path.append(os.path.dirname(os.path.dirname(os.path.realpath(__file__))))

from src.containers.BeaconsProcess import BeaconsProcess

if __name__ == '__main__':
    runner = BeaconsProcess()
    try:
        runner.run()
    except Exception as ex:
        ConsoleLogger().fatal("Beacons", ex, "Error: ")
        print(traceback.format_exc())
        sys.stderr.write(str(ex) + '\n')
In the code above, all we’re doing is creating an instance of the container we described earlier, telling it where to find the configuration file, and running it using the run() method.
To run the microservice, execute the following command from a terminal at the root of the project:
node ./bin/main.js
dotnet build # build

dotnet src/process/bin/debug/net5.0/main.dll -c ./config/config.yml # start with config file
go run ./bin/main.go
dart ./bin/run.dart
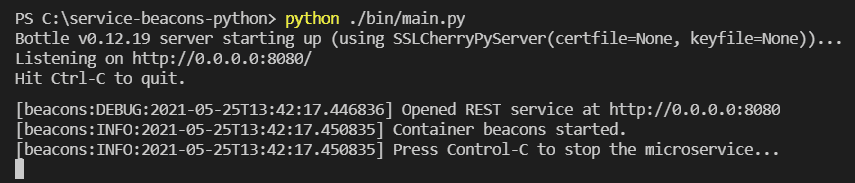
python ./bin/main.py
You should get a result similar to the one shown below.
Since we opted for the console logger in our configuration file, all information is going to be printed to the console. The service is using the in-memory persistence by default. To switch over to the MongoDB persistence, the MONGO_ENABLED environment variable has to be set and MongoDB should be running. This can be done either by starting the service from a script, in which we set our environment variables beforehand, or by configuring them in the OS’s environment.
Let’s use the following two commands to set our environment variable and start our microservice using the MongoDB persistence:
export MONGO_ENABLED=true

node .\bin\main.js
export MONGO_ENABLED=true

dotnet src/process/bin/debug/net5.0/main.dll -c ./config/config.yml
export MONGO_ENABLED=true

go run ./bin/main.go
export MONGO_ENABLED=true

dart ./bin/run.dart
export MONGO_ENABLED=true

python .\bin\main.py
Make sure that you have MongoDB running locally or in an accessible Docker container (i.e. whose ports are exposed), and that the connection parameters set in the configuration file are correct.
We can use the following docker composer configuration to run MongoDB in Docker:
/docker/docker-compose.yml
version: '3.3'

services:

  mongo:
    image: mongo:latest
    ports:
      - "27017:27017"
And use the following command to get it up and running:
docker-compose -f ./docker/docker-compose.yml up
Once the microservice has started, we can check whether or not it is available by requesting the following URL from a browser: http://localhost:8080/heartbeat. If everything is working correctly, we should receive the current date and UTC time in the JSON format. This mechanism allows us to check whether or not our microservice is up and running at any given time.
Now let’s request the status URL from our browser: http://localhost:8080/status. This should generate a response with information about the service in a JSON format, such as: its name, what modules are loaded, etc. This mechanism allows us to identify our microservices while they’re running.
{
  "id": "microservice-server",
  "name": "beacons",
  "description": "Beacons microservice",
  "start_time": "2021-05-25T16:46:30.079416Z",
  "current_time": "2021-05-25T16:47:07.027093Z",
  "uptime": 36947.676999999996,
  "properties": {},
  "components": [
    "pip-services:context-info:default:*:1.0",
    "pip-services:factory:container:default:1.0",
    "pip-services:context-info:default:default:1.0",
    "pip-services:logger:console:default:1.0",
    "pip-services:tracer:log:default:1.0",
    "pip-services:counters:log:default:1.0",
    "beacons:persistence:memory:default:1.0",
    "beacons:controller:default:default:1.0",
    "pip-services:endpoint:http:default:1.0",
    "beacons:service:http:default:1.0",
    "pip-services:swagger-service:*:*:1.0",
    "pip-services:heartbeat-service:http:default:1.0",
    "pip-services:status-service:http:default:1.0",
    "pip-services:swagger-service:http:default:1.0"
  ]
}
Let’s move on to testing the main functionality of our microservice. Our set of commands for working with the service is available at the base path of http://localhost:8080/v1/beacons, using the POST method.
We could use a REST client to test our microservice, but for the sake of this example, we’ll be using curl instead.
Let’s check the availability of our commands - the very same ones we defined in our CommandSet.
First, we’ll attempt to create a few beacons in the system:
curl -X POST -H "Content-Type: application/json" -d "{\"beacon\":{\"id\": \"1\", \"udi\": \"00001\", \"type\": \"altbeacon\", \"site_id\": \"1\", \"label\": \"TestBeacon1\", \"center\": { \"type\": \"Point\", \"coordinates\": [ 0, 0 ] },\"radius\": 50}}" http://localhost:8080/v1/beacons/create_beacon
curl -X POST -H "Content-Type: application/json" -d "{\"beacon\":{\"id\": \"2\", \"udi\": \"00002\", \"type\": \"altbeacon\", \"site_id\": \"1\", \"label\": \"TestBeacon2\", \"center\": { \"type\": \"Point\", \"coordinates\": [ 2, 2 ] },\"radius\": 70}}" http://localhost:8080/v1/beacons/create_beacon
Update the second beacon by changing its coordinates and radius:
curl -X POST -H "Content-Type: application/json" -d "{\"beacon\":{\"id\": \"2\", \"udi\": \"00002\", \"type\": \"altbeacon\", \"site_id\": \"1\", \"label\": \"TestBeacon2\", \"center\": { \"type\": \"Point\", \"coordinates\": [ 2, 4 ] },\"radius\": 80}}" http://localhost:8080/v1/beacons/update_beacon
Retrieve a list of all available beacons using the command below:
curl -X POST http://localhost:8080/v1/beacons/get_beacons
We should get the following JSON response with all of the beacons currently in the system:
{
  "total":2,
  "data":[
    {
      "id":"1",
      "udi":"00001",
      "type":"altbeacon",
      "site_id":"1",
      "label":"TestBeacon1",
      "center":{
        "type":"Point",
        "coordinates":[
          0,
          0
        ]
      },
      "radius":50
    },
    {
      "id":"2",
      "udi":"00002",
      "type":"altbeacon",
      "site_id":"1",
      "label":"TestBeacon2",
      "center":{
        "type":"Point",
        "coordinates":[
          2,
          4
        ]
      },
      "radius":80
    }
  ]
}
Try to get the first beacon by its UDI using the command:
curl -X POST -H "Content-Type: application/json" -d "{\"udi\":\"00001\"}" http://localhost:8080/v1/beacons/get_beacon_by_udi
We should receive the following response:
{
  "id":"1",
  "udi":"00001",
  "type":"altbeacon",
  "site_id":"1",
  "label":"TestBeacon1",
  "center":{
    "type":"Point",
    "coordinates":[
      0,
      0
    ]
  },
  "radius":50
}
To calculate a device’s position, use the following request:
curl -X POST -H "Content-Type: application/json" -d "{\"site_id\": \"1\",\"udis\": [\"00001\", \"00002\"]}" http://localhost:8080/v1/beacons/calculate_position
As a result, you should get the following coordinates:
``json {“type”:“Point”,“coordinates”:[1,2]}
Now let's delete a beacon by its id:

```bash
curl -X POST -H "Content-Type: application/json" -d "{\"beacon_id\":\"1\"}" http://localhost:8080/v1/beacons/delete_beacon_by_id
The system will return the deleted beacon if deletion was successful:
{
  "id":"1",
  "udi":"00001",
  "type":"altbeacon",
  "site_id":"1",
  "label":"TestBeacon1",
  "center":{
    "type":"Point",
    "coordinates":[
      0,
      0
    ]
  },
  "radius":50
}
Let’s make sure that there’s only one beacon left in the system by asking again for a list of all available beacons:
curl -X POST http://localhost:8080/v1/beacons/get_beacons
As a result, only the beacon with an id of “2” is returned.
{
  "total":1,
  "data":[
    {
      "id":"2",
      "udi":"00002",
      "type":"altbeacon",
      "site_id":"1",
      "label":"TestBeacon2",
      "center":{
        "type":"Point",
        "coordinates":[
          2,
          4
        ]
      },
      "radius":80
    }
  ]
}
And that’s it! Congratulations! You’ve created a microservice that’s far more advanced than the regular “Hello, World” example! All source code is available on Github (pip-services-beacons-*)